Wednesday, October 9, 2013

Ickey Sticky Gooey Goo


Homemade Gooey Stuff


Little Mr A loves blue. Anything blue, everything has to be blue. So I made him some blue "gooey stuff"

I've made it before and I'll make it again, its awesome stuff but doesn't keep. And it makes a mess. Alot of mess. And double the mess you are thinking of!!

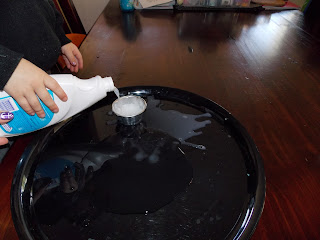
That is why this big black tray is so important. Use a baking tray if you don't have a big black plastic plate!

Skills Used:
  • Fine Motor endurance
  • Following instructions
  • Finger isolation


You will need:
  • A big tray for the goo to go (and stay!) on
  • Fabulon (laundry starch)
  • Cheap craft glue - PVA glue. I bought mine from the $2 shop. I bought a few different bottles including a clear PVA glue (pictured) and one bottle didn't have the chemical reaction that made goo. 
  • A container for a measurement unit
  • Food dye if wanted
  • Plastic spoon to throw away once done - I didn't want to use something that I put in my mouth to stir this mix
  • Water


Pour equal parts of water, glue and fabulons together. I got Little Mr A to pour the ingredients into the cup. A little bit of a selfish reason, I didn't want to get messy!


Stir mixture together. You will feel it start to stick together more and turn gooey.


Add your colour and enjoy!!


Tuesday, October 8, 2013

Bacon and Cheese Rolls

Homemade Bacon and Cheese Rolls


My Little Mr A LOVES bacon and cheese rolls. Back when my Hubby did FIFO (Fly-in Fly-out) and I was working I didn't think much of spending $4 on 4 rolls to have as a snack. Well how times have changed and the word BUDGET is now part of every day vocabulary, I've started to think that these rolls are a tad expensive. So I went on a quest to make my own. 

I went to taste.com (my favourite internet recipe site) and looked it up. I wanted to make more of a roll and not flat breads, so I kept them relatively round.  I portion of bread made 12 rolls. I have since made another batch and made 16 rolls, but they were quite small so I think I will stick to 12 rolls next time. Also take them out of the oven when cheese is just starting to turn brown so the bread is really soft!

Cut up dough. 
Little Mr A was helping me to roll into a nice round shape and put it on the floured tray. He also wanted to do a rectangle shape and a circle.   

Cost $0.50 (about 1/2kg of flour and a bit of yeast, oil and water)


I buy bacon when its cheap and freeze it as it freezes well and it
usually goes in cooking as a cheap way to flavour meals. 

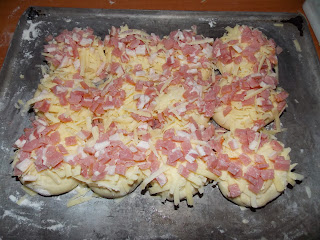
This was 4 slices of short cut bacon, about 200gms and about 1 cut of cheese, about 150gms.


Little Mr A loved helping to sprinkle all the toppings on!


Bacon and cheese Cost: $3.50


Cost Total : $4 for 12 buns. 

That is ONE THIRD of the cost in the shops! Plus you get the upper body work out of kneading the dough and the smell of fresh bread baking in your oven. So simple and easy to make! And its super easy to make while you got kids, as there is alot of waiting time between steps so you don't need to stay in the kitchen for an hour. I baked these between cooking dinner, feeding baby and cleaning the kitchen!

Next I'm going to try to make the bread pizza's, the ones that are even more pricey in the shops! Bakers Delight charge $4 per pizza!


Wednesday, October 2, 2013

Marshmallow Sherbet Cones

Homemade Marshmallow Cones


The other day we went to the shops, our big outing of the public holiday, as we were all sick. As a special treat we bought sherbet cones. While eating them later at home I remembered making sherbet  and marshmallow as a teenager and thought how hard could it be to combine it all to make these?!

But ahhh....the mess that followed!

What you need:

  • 1 packet of ice cream cones. The smallest ones are best
  • 1 quantity of sherbet
  • 1 quantity of marshmallow
  • Spinkles to decorate


Sherbet

1 cup sifted icing sugar
1 teaspoon citric acid
1/2 teaspoon bicarb soda

Sift and mix ingredients together


Marshmallow

1 cup glucose syrup (corn syrup)
1 1/2 cups sugar
1 cup water
2 1/2 tablespoons of gelatine
a few drops of food dye if wanted - although sprinkles covers the entire top

In your mixing bowl add 1/2 cup of your water to the gelatine and mix well
Add the sugar, glucose and other 1/2 cup water to a heavy based frypan or saucepan. Mix well to combine.
Heat over a medium flame. DO NOT STIR ONCE IT IS ON THE STOVE.
Cook for 8min or until a drop of the mix forms a soft ball when dropped into a little bowl of water.
Pour into mixing bowl and mix for about 10min or until mix has tripled in size.
Unbeaten marshmallows

Little Mr A patiently waiting for marshmallows to appear

Putting it all together

First put a heaped teaspoon of sherbet into each cone if you are using stand up cones. Otherwise make sure you don't have little kids around to make a mess with the sherbet while you leave it unattended, and spoon the sherbet in as you go.

Spoon into piping bags - use disposable ones as it is messy enough anyway! I added a drop of food colour to the piping bag edge before putting marshmallow in. I won't do it next time as the sprinkles cover the marshmallows.

I had to change Little Baby J's nappy so had to pause marshmallow making for a bit - and the lumpy look of the marshmallows is the result. If you pipe it straight away you should get a nice elegant looking marshmallow top!

Next dip the top in sprinkles, we went for dinosaur sprinkles and multi coloured sprinkles, but I had thought about doing cachous (you know the little silver balls) but thought against it after looking at the mess Little Mr. A was in just with the marshmallow.


While I cleaned up I told Little Mr. A he could "lick" the bowl (you can't lick a bowl of set marshmallow very sucessfully!! heheheh!! :-D ) - while I wasn't looking he tipped the rest of the sprinkles in....

I had some left over marshmallow mix so I piped it into a small bowl of cornflour - it leaves you less sticky than icing sugar. There were more but somehow they disappeared before I could take a photo, Little Mr. A had a blue tongue but promised he didn't eat them!


So there you have it, cheap and yummy sherbet cones. I think a treat once every few months or for special occasions will be ok, not making a habit of making these!

Next time I will try making mini ones, I saw some mini waffle cones in the markets I'll pick some of those up next time as these were HUGE!